Products
01 May 2025
New Lock Hardware Kits for Modular Gates Available Now

First Fence Launches Hardware Kits for New Modular Gate Ranges. First Fence is launching a new modular gate system, designed to make fitting hardware quick and simple. Our gates work with a range of third-party locks and accessories, with no need for extra changes. In this blog, you’ll learn what makes our modular gates different, the lock kits available, and how to install them in a few easy steps.
Soon To Be Announced
First Fence has been redeveloping its gate ranges to be fully modular, allowing for a range of 3rd party hardware to fit easily and seamlessly onto the gate frames with no modifications required.
What is a Modular Gate?
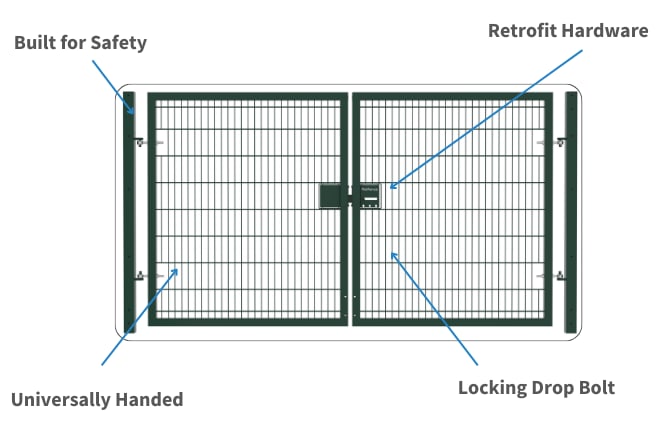
- Built for Safety: Compliant to BS 12604, holes included for safety tethers.
- Universally Handed: Centre-welded mesh allows a gate leaf to be used as a left or right-hand leaf, along with working as a single or double up for a double gate set.
- Retrofit Hardware: Slider assembly (known as UniSlide) or 3rd party locking devices can be bolted on and off, allowing the customer to devise on the primary gate leaf and swing direction
- Locking Drop Bolt: Drop bolt supplied as standard with each gate set, designed to be bolted on by the customer. No padlock required as the flag handle has an anti-lift feature once in the closed position.
Lock Kits: What’s Included
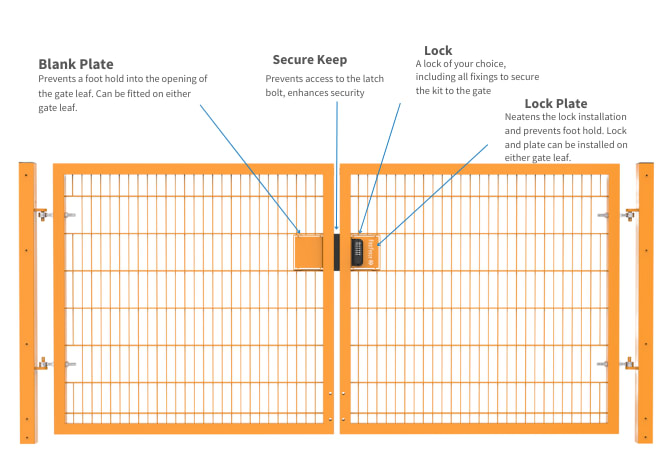
Each Lock kit includes the following:
- Blank Plate: Prevents a foothold into the opening of the gate leaf. Can be fitted on either gate leaf.
- Secure Keep: Prevents access to the latch bolt, enhances security
- Lock-: A lock of your choice, including all fixings to secure the kit to the gate. Our gate locks include, deadbolt gate lock, gate latch deadlock, quick exit key latch gate lock, double-sided digital gate lock, single-sided gate lock and quick exit digital gate lock.
- Lock Plate: Neatens the lock installation and prevents foothold. Lock and plate can be installed on either gate leaf.
Gate Styles
The locking kits work on the following gate styles:
Kit Options
- Deadbolt Gate Lock Kit
- Gate Latch Deadlock Kit
- Quick Exit Key Latch Gate Lock Kit
- Double Sided Digital Gate Lock Kit
- Single Sided Gate Lock Kit
- Quick Exit Digital Gate Lock Kit
Where to Find Me on the Website
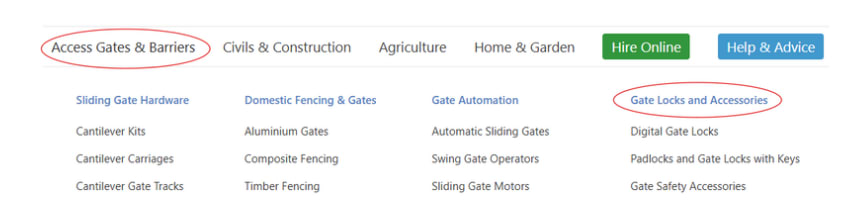
Our Gate locks are located in the Gate Locks and Accessories section on our website.
Installation
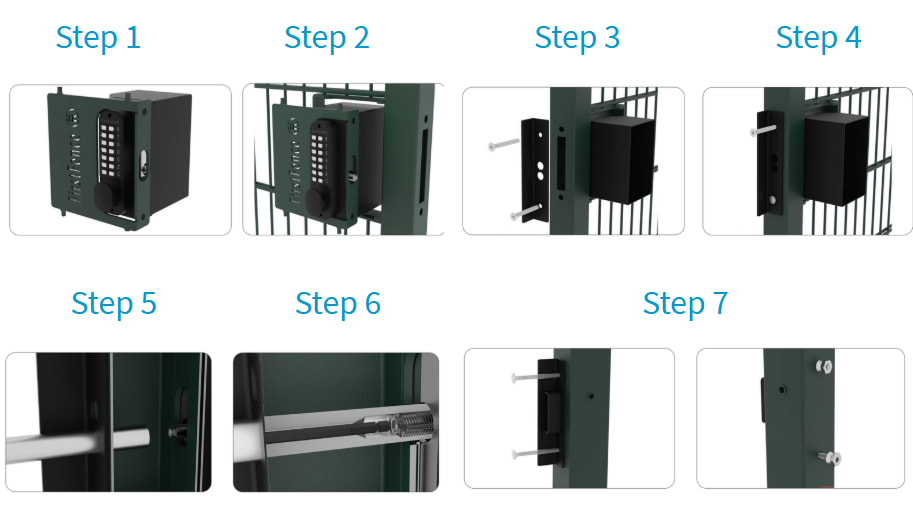
- Step 1: Place the lock plate onto the front face of the gate leaf.
- Step 2: Place the lock body of your chosen lock in the aperture of the lock plate.
- Step 3: Place the gate keeper plate on the outer edge (slam style) of the gate leaf.
- Step 4: Secure the keep, lock plate and lock together with the supplied M8 x 90mm bolts.
- Step 5: Rotate the latch bolt clockwise and ensure 15mm of latch is protruding. Always ensure the taper of the latch is pointed in the direction of gate travel.
- Step 6: Lock the latch bolt into position with the supplied 5mm long neck Allen key.
- Step 7: Locate the second part of the keep into the catch post. Install using the M8 square cup head bolts (100mm bolt for 80mm post or 120mm bolt for the 100mm post). Please note, the expanding fasteners supplied with the keep will not work with this setup. These can be disposed of.
For a detailed installation guide, check out our installation video.
Contact Us
For more information or a free, no obligation quote, give our friendly sales team a call on 01283 512 111.
Download the PDF version of New Lock Hardware Kits for Modular Gates Available now.


